
You have fifteen minutes before the next thing on your calendar. A trip to the gym is out, and you don’t want to spend half that time choosing a workout. This is the perfect time for a 15 minute military calisthenics workout.
That’s the situation this guide is for. I’ll walk you through a short bodyweight session you can do at home, explain how to make the movements manageable, and show you what to record afterward.
The word “military” can make a workout sound intimidating. You won’t need to keep pace with a drill instructor here. Start with movements you can control and leave yourself enough time to rest.
Fifteen minutes gives you a place to start. Whether that is enough for your longer-term goals depends on the exercises, the challenge, and how the rest of your training week looks, especially if you’re incorporating the 15 minute military calisthenics workout.
This article contains affiliate links. If you buy through them, I may earn a commission. As an Amazon Associate, I earn from qualifying purchases.
Table of contents: jump to a section
What Is Military Calisthenics?
Calisthenics means using your body weight as resistance. Squats, push-ups, and many floor exercises fit that description.
Online, “military calisthenics” is often used for circuits built around familiar bodyweight movements. The name doesn’t tell you how difficult a workout will be, whether it follows an official military program or whether it suits a beginner.
This is an introductory home routine, not military fitness-test preparation. It works through leg movements, pushing and trunk control, with easier options where you need them.
By dedicating just 15 minutes each day to military callisthenics, you can achieve significant results and improve your fitness level.
There is one gap to understand: it doesn’t include a substantial pulling exercise. If this becomes your regular training approach, you’ll need to consider rows or another suitable pulling movement as part of your wider plan.
Is a 15-Minute Workout Worth Doing?
If limited time keeps stopping you from starting, a short session is a practical option to explore. It gives you a defined task without asking you to reorganize the whole day.
ACSM’s 2026 guidance recognizes bodyweight exercises, resistance bands, and home training as useful forms of resistance exercise. It focuses on training the major muscle groups at least twice weekly, with the program adapted to the person and their goals.[1]
That doesn’t mean every fifteen-minute video provides a balanced program. The movements still need to suit your ability, and you need a way to adjust the challenge as you progress.
Here’s how I’d weigh up this format before committing to it:
| What you need | Where this format helps | What to keep in mind |
|---|---|---|
| A place to start | A short session with a clear order | Read the instructions before starting |
| Little equipment | Bodyweight movements cover several patterns | Pulling exercises need a separate plan |
| A manageable pace | Easier variations and adjustable rests | A video timer shouldn’t dictate your speed |
| A long-term muscle-building plan | A starting point for recording your training | You may eventually need more time, resistance or exercise variety |
Set Up Before Starting the Timer
Clear enough space to lie down and extend your arms and legs. Put your phone timer somewhere you can see it without having to turn your head.
Have a stable, non-wheeled chair available for sit-to-stands, positioned so it cannot slide. For easier push-ups, choose a wall or fixed counter that can support your weight. Avoid folding furniture and movable tables.
This routine assumes you can comfortably get down to the floor and back up. If that is difficult, a standing routine would be a better starting point than rushing through floor transitions.
Stop if you experience sharp pain, dizziness or unusual breathlessness. If an injury or health condition affects your exercise choices, get individual guidance on appropriate movements.
The 15-Minute Workout
Use three minutes to prepare, ten minutes for the circuit and two minutes to slow down and make a few notes. You will repeat the same five exercises twice.
Each exercise gets a one-minute slot: up to 40 seconds of movement, followed by 20 seconds to rest or change position. You can stop earlier and use the remaining time to rest.
| Time | Exercise or task | Starting option |
|---|---|---|
| 0:00–3:00 | Gentle preparation | March, move your shoulders and rehearse easy repetitions |
| 3:00–4:00 | Sit-to-stand | Use a secured chair |
| 4:00–5:00 | Push-up | Start at a wall |
| 5:00–6:00 | Supported calf raise | Hold a stable support lightly |
| 6:00–7:00 | Glute bridge | Use a comfortable lifting range |
| 7:00–8:00 | Bird dog | Move one arm or leg at a time if needed |
| 8:00–13:00 | Repeat the five exercises | Keep the same order |
| 13:00–15:00 | Slow down and log the session | Walk gently, then record what you completed |
The clock organizes the workout. It doesn’t decide when you’re ready for the next exercise. Pause it when you need more recovery or time to change position, even if that means finishing after fifteen minutes.
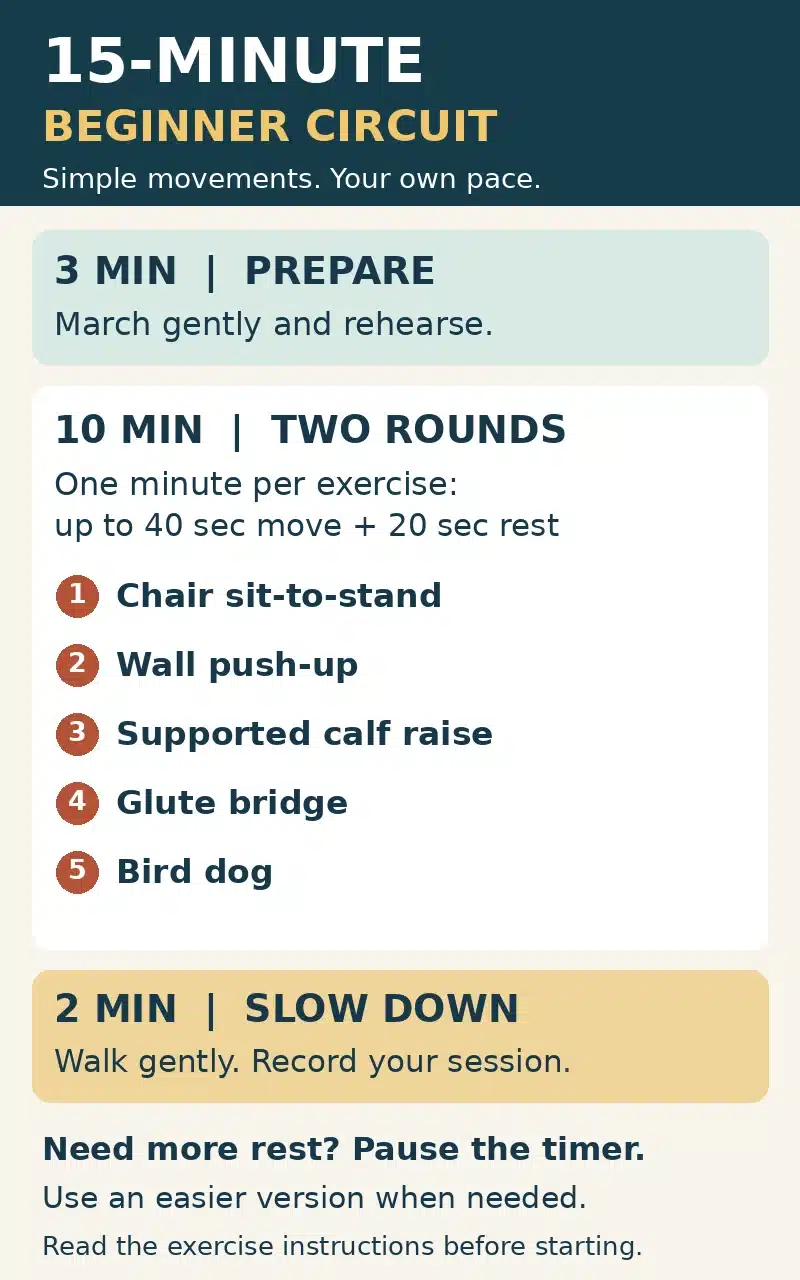
Workout infographic summary: Prepare for three minutes. Repeat sit-to-stand, wall push-up, supported calf raise, glute bridge and bird dog twice, using one minute per exercise. Finish with two minutes to slow down and record the session. Work for up to forty seconds, rest for twenty, and pause whenever you need longer.
1. Chair Sit-to-Stand
Sit near the front of your secured chair with both feet planted. Lean forward slightly, stand, then lower yourself back onto the seat with control.
Use your hands for help if necessary. Begin with a few repetitions and avoid dropping onto the chair as you tire.[2]
Keep this version until it feels manageable. You can then work toward using less hand assistance before considering an unsupported squat.
2. Wall or Counter Push-Up
Place your hands around chest height on a wall and step back a comfortable distance. Bend your elbows to bring your chest toward the wall, then press away while keeping your body aligned.
Keep breathing and end the set before your position starts to change.[2] When the wall version becomes manageable, a suitable fixed counter offers another option.
There is no deadline for doing floor push-ups. Record the surface you use so you can compare sessions fairly.
3. Supported Calf Raise
Stand beside a stable support, raise both heels, and lower them slowly. Use the support for balance and keep the movement controlled.[2]
Start on level ground. You don’t need to stand on the edge of a step or turn this into a balance challenge.
If you find yourself bouncing to keep going, stop and rest for the remainder of the interval.
4. Glute Bridge
Lie on your back with your knees bent and feet flat. Gently tighten your trunk, press through your feet, and lift your hips to a comfortable height.
Lower slowly before repeating. Avoid pushing your hips so high that you arch your lower back, and keep breathing through the movement.[3]
If the position is uncomfortable, leave it out rather than repeatedly trying to force a bigger range. Get help choosing a suitable alternative.
5. Bird Dog
Start on your hands and knees, with your hands beneath your shoulders and your knees beneath your hips. Slowly reach one arm forward and the opposite leg backward, return, then change sides.
Keep your trunk steady instead of twisting or arching to reach farther.[4] If moving both limbs is difficult, begin with one arm or one leg at a time.
Take your time changing sides. Count the repetitions you can control rather than trying to fill every second with movement.
How to Make Progress Without Rushing
For the first few sessions, keep the exercise choices consistent. Learning your starting point is more useful than finding a harder version every time you train.
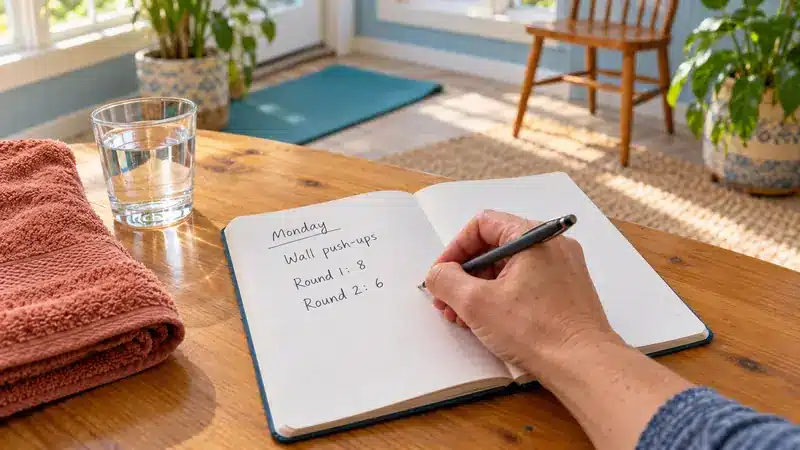
Write down the variation, repetitions in each round, and anything that affected the session. A note such as “wall push-ups: eight in round one, six in round two” gives you something concrete to revisit.
When that becomes manageable, change one thing. You might add a controlled repetition or use a little less assistance during sit-to-stands.
Shortening rest isn’t automatically the right next step. If it makes you rush, lose control, or struggle through transitions, keep the rest and adjust something else.
A phone note or ordinary notebook is enough. If you prefer a separate place for your training records, view the fitness journal on Amazon. Choose the format you’ll actually use.
For a more extensive look at progress, see how to tell if your body is gaining muscle. One difficult workout or a single change on the scale isn’t much to judge a plan by.
Where This Fits in Your Week
For this beginner example, start with two nonconsecutive sessions, such as Monday and Thursday. That gives you a simple schedule to try without making every day a training day.
Review how the movements feel and how you recover before adding more. If you’re already following another strength program, count the work you’re doing there rather than automatically adding this circuit on top.
Eventually, you may want longer sessions, more resistance, or a wider range of exercises. That is a reason to reexamine the plan, not to cram more work into fifteen minutes.
The muscle-building training options guide can help you compare what comes next.
What About Pulling Exercises and Equipment?
This is the main limitation of the routine. Push-ups, calf raises, and floor exercises don’t replace rows or other substantial pulling movements.
A long resistance band with an appropriate setup or a dumbbell row may be options later. Follow the exercise instructions and use the equipment according to the manufacturer’s guidance. Don’t improvise hanging exercises from household tables or doorframes.
If you’re considering adjustable dumbbells for a wider home workout program, check out the Core Fitness adjustable dumbbells on Amazon. Check the current listing for the starting weight, adjustment increments, dimensions, and return terms before deciding.
They aren’t needed for the session above. I would wait until you know which exercises you want to add and what resistance you can manage before making that purchase.
Keep Meals Practical, Too
When time is already tight, an elaborate meal plan can become another task you put off. Start with one or two meals you can repeat without much thought.
That might be yogurt with oats and fruit for breakfast, or a rice bowl with beans, tofu or chicken and vegetables. Use familiar foods and portions that fit your needs.
You don’t need to prepare every meal for the week. Having tomorrow’s lunch ready may be enough to make the next day easier.
If containers are what you’re missing, view Rubbermaid Brilliance food containers on Amazon and compare sizes with the meals you pack. Containers you already own are fine, too.
For more combinations, visit the foods-for-muscle-growth guide. There’s no need to turn this beginner workout into a supplement shopping list.
Frequently Asked Questions
Can You Build Muscle With a 15-Minute Workout?
Bodyweight resistance training can contribute to muscle growth, but the duration alone doesn’t determine whether a workout provides enough challenge or enough weekly training volume. Exercise selection, progression, and your wider routine matter. This introductory circuit is a starting point, not a guarantee of results.[1]
Should Beginners Add Burpees or a Finisher?
You don’t need a finisher for this example. Use the final two minutes to slow down and record the session. Learn the main movements before deciding whether additional conditioning is right for your plan.
How Often Should I Do This Routine?
Start with two nonconsecutive sessions a week for this beginner example. Modify according to your recovery, other exercise, and individual needs. Don’t assume that a short workout needs to be repeated every day.
Will Fifteen Minutes of Exercise Help Me Lose Weight?
You cannot predict weight loss from a workout’s duration or title. Body-weight changes depend on your broader eating and activity patterns across time. Choose this session for a manageable way to practice exercise rather than a promised amount of fat loss.
What If I Can’t Finish the Forty-Second Interval?
Stop earlier. Forty seconds is the maximum work window here, not a minimum you must reach. Perform the repetitions you can control and rest; pause the timer if the scheduled break isn’t long enough.
What Should I Do When the Routine Becomes Too Easy?
Check your notes and adjust one exercise at a time. If you need more resistance, additional exercises, or longer rests, consider a different session format. You don’t have to keep the fifteen-minute limit forever.
Your Next Step
Choose a time, clear your space, and read through the movements before starting. Use the easiest suitable versions and write down what you complete.
Then choose when you’ll do it again. I seek to help you leave with a routine you understand, a record you can compare, and a clear idea of what you might change next.